Leaking water heaters rarely start with a dramatic burst. Most begin as a slow dribble from a valve that was ignored or a seam that corroded unnoticed behind boxes in the garage. By the time a homeowner sees pooling water, the fix has typically grown from a simple service call into a replacement decision. The good news: routine water heater maintenance catches the earliest clues and extends the life of both tank-style and tankless systems. It also protects floors, sheetrock, and the patience of whoever pays the water bill.
I’ve stood next to enough rusty drain pans and damp furnace rooms to know that prevention is more than a clever idea. It’s a small set of habits that keep leaks from ever getting a foothold. Whether you just scheduled water heater installation for a new build, are weighing water heater replacement on a 12-year-old tank, or you’re chasing a tricky drip on a tankless water heater, the principles are the same: monitor pressure, control temperature, reduce sediment, and validate safety components that fail gracefully instead of catastrophically.
Why water heaters leak in the first place
Leaks come from a handful of recurring culprits. Sediment is the quiet instigator. Municipal water carries minerals and fine grit that settle inside tank-style heaters, baking into a crust on the bottom. That crust insulates the water from the burner or elements, forcing longer heat cycles. The metal at the bottom of the tank gets hotter than it should, which stresses the steel and speeds up corrosion. Eventually the anode rod, designed to sacrifice itself to protect the tank, is consumed, and the tank wall becomes the anode. When a tank weeps at a seam, sediment has usually had years to do its work.
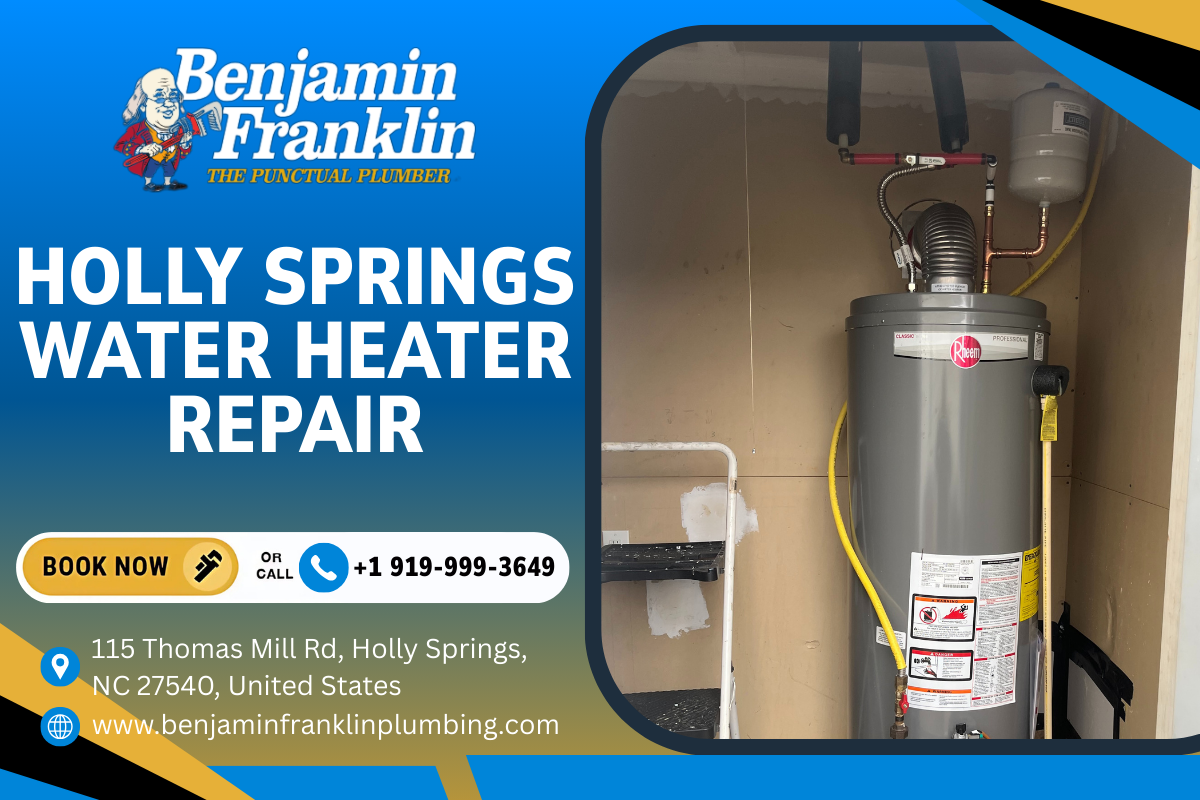
Pressure is the next driver. Water expands as it heats. In most modern neighborhoods, especially those around Holly Springs, houses have check valves or pressure-reducing valves that make the plumbing system “closed.” Without a thermal expansion tank, that expansion spikes pressure. A temperature and pressure relief valve will open to prevent a dangerous overpressure situation. If pressure is consistently too high, that valve will weep. Over time, what looks like a finicky valve is actually a symptom of system pressure that needs correction. Ignoring it leads to a constant trickle, water damage, and premature component wear.
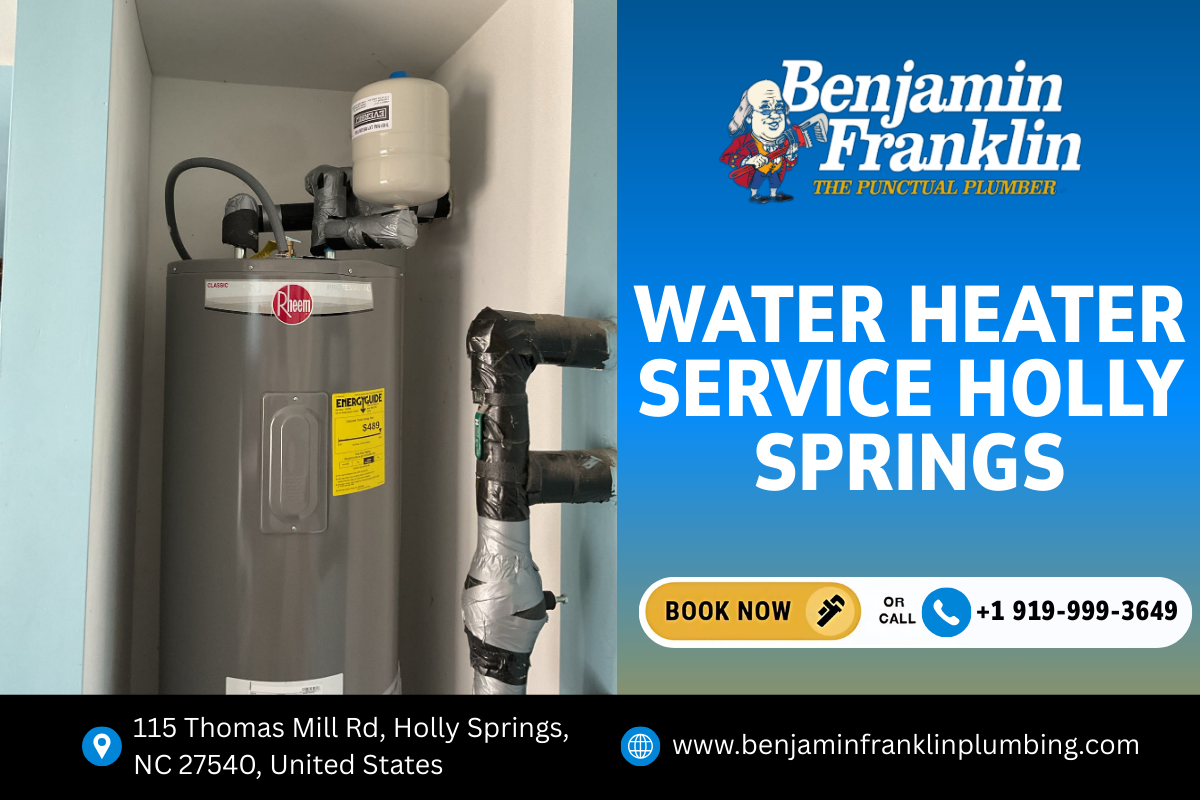
Connections are another source. Flexible supply lines can kink or crack with age. Dielectric unions can corrode where copper meets steel. On gas models, the drain valve at the bottom is notorious for seeping if its washer hardens. On electric models, the gaskets on heating elements can start to drip under the insulation jacket, so the first clue might be moisture pooled in the pan.
Tankless units don’t hold a large volume of water, but they still leak. Minerals build up inside the heat exchanger, creating hot spots. Condensate drains can clog and back up into the cabinet. Internal O-rings age and weep. In my experience, tankless water heater repair calls in Holly Springs often trace back to skipped descaling or a missing sediment filter on a well supply.
None of these failures appear overnight. They all leave fingerprints: changes in pressure behavior, hot water performance, or tiny amounts of moisture where it shouldn’t be. Routine water heater service is about reading those signs before they turn into damage.
The maintenance habits that actually matter
Let’s separate nice-to-haves from needle-movers. The key tasks are a short list: test the temperature and pressure relief valve, manage temperature, control system pressure with an expansion tank where needed, remove sediment, and inspect connections and combustion or electrical components. Done regularly, these prevent most leaks.
Test the T&P relief valve without causing one
Every storage water heater has a temperature and pressure relief valve near the top. That valve is your last line of defense against a runaway heat condition or a pressure spike. Testing it proves two things: water can exit through the discharge line without obstruction, and the valve still operates.
Flip the lever for a quick second while you have a bucket under the discharge pipe. You should hear water rush and then stop cleanly when you release. If the valve won’t move, or it continues to dribble afterward, it’s due for replacement. I’ve seen valves cemented shut by mineral deposits in as little as four years in hard water areas. A nonfunctional valve isn’t just a leak risk; it’s a safety hazard.
One caution: do not test a T&P valve that is clearly corroded, installed without a proper discharge line, or attached to a tank with visible rust around the valve port. In those cases, schedule water heater repair before touching it. A compromised port can crack when stressed.
Set the temperature to protect the tank and the occupants
I aim for 120 degrees Fahrenheit at the tap for most homes. At that setpoint, scald risk drops, energy use falls, and thermal expansion decreases. Higher temperatures accelerate mineral precipitation inside the tank and raise system pressure. If you keep thermostats at 140 for legionella control, use mixing valves to deliver 120 at fixtures. That balances hygiene and safety.
On electric units with dual elements, verify both thermostats are set evenly. Uneven settings can create constant short-cycling that stresses elements and gaskets. On gas models, ensure the gas control is within the manufacturer’s recommended range and not on a “Very Hot” position just to mask a performance issue like sediment.
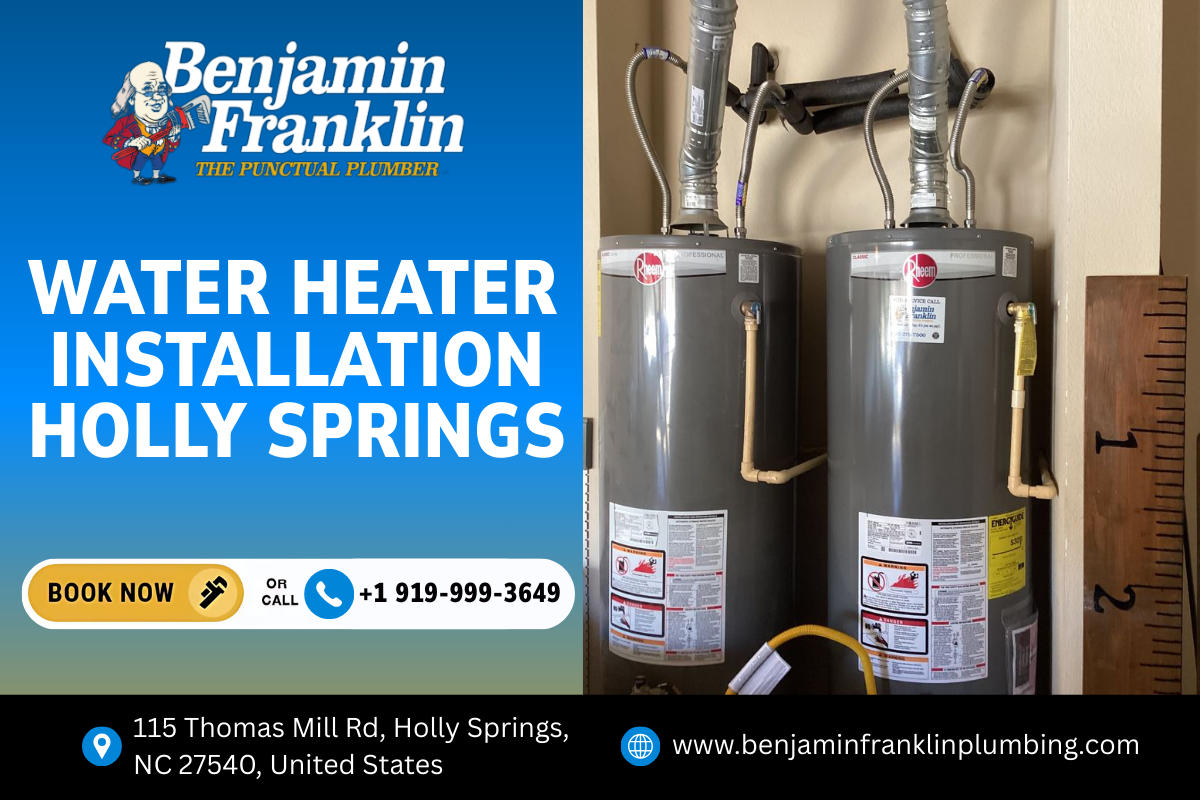
Use an expansion tank if you have a closed system
If your home has a pressure-reducing valve, check valve, or backflow preventer on the main, it’s a closed system. That means heating water has nowhere to expand. Without an expansion tank, pressure can briefly spike 50 to 100 psi during a heat cycle. The T&P valve opens to relieve it, then closes. Repeat that dance for months, and you get a constant weep, a crust of mineral on the discharge pipe, and a mystery puddle.
A properly sized expansion tank, pre-charged to match your static water pressure, absorbs that expansion and keeps the T&P valve dry. I’ve installed expansion tanks that immediately stopped chronic “leaks” from relief valves that were doing their job too often. If you see pressure swings on a gauge or hear pipes knock when the heater fires, ask for a water heater service visit to evaluate the need for an expansion tank.
Flush sediment before it becomes armor plating
Flushing sounds simple, but technique matters. On a tank-style heater, hook a hose to the drain valve and route it to a safe drain or outside. Open the valve and watch what comes out. If the heater has never been flushed, don’t crank the valve fully open. A sudden rush can stir up sediment and lodge it inside the valve, leaving it stuck open. I start with a quick quarter-turn, let it run, close and repeat. Once it runs clear, you can open more confidently. Some pros use the cold water supply as a gentle push to stir and drain in cycles. The first flush often removes several pounds of mineral grit. Do this annually in moderate water hardness areas; twice a year if your water is visibly hard or if you hear popping sounds during heating.
If the drain valve won’t shut tightly after a flush, screw on a brass garden hose cap as a backup and plan to replace the valve. Many OEM plastic drain valves are notorious for seeping; swapping to a full-port brass valve during water heater replacement or major service makes life easier.
Inspect the anode rod before the tank sacrifices itself
The anode rod is the unsung hero inside a tank heater. It attracts corrosion so the tank doesn’t. In areas around Holly Springs with moderate hardness, an anode can last anywhere from three to six years; on well systems with aggressive water, I’ve seen them eaten to a wire core in two. Checking it requires breaking the anode’s hex head loose from the top and lifting it out. If it’s down to the steel core or coated in thick calcium that no longer reacts, replace it. If ceiling clearance is tight, use a segmented anode rod that flexes into place. A good anode rod is the difference between a water heater that lasts 6 to 8 years and one that pushes past 12.
Check fittings, dielectric unions, and drain pans
Run your fingers around the cold and hot connections at the top. A tiny bead of moisture often precedes a visible drip. Dielectric unions should be clean and free of white or green corrosion bloom. For gas models, sniff for gas at the control valve area and soap-test if you have any doubt. For electric models, inspect the element covers for signs of moisture or rust. The pan underneath should be dry and connected to a functioning drain line. I’ve seen beautifully installed pans that never tied into a drain. They’re a false sense of security, filling quietly until a homeowner discovers water on the living room ceiling below.
For tankless units: descale and mind the condensate
Tankless water heater repair often starts with descaling. Circulate a descaling solution like food-grade vinegar or a manufacturer-approved cleaner through the heat exchanger using a small pump and hoses connected to the service ports. In most homes, annual descaling is enough; on well supplies or very hard municipal water, twice a year makes sense. While the cover is off, inspect for any weeping at internal connections, clean the inlet filter screen, and confirm the condensate drain is clear and properly trapped. A clogged condensate line can force water back into the cabinet, mimicking a leak in the heat exchanger.
If your tankless vents through PVC, check for any signs of condensation outside the drain path. Mis-pitched vent runs will trap water and can leak at joints. Manufacturers specify one-quarter inch per foot pitch back to the unit or a dedicated drain, and ignoring that detail shows up as mystery drips.
A seasonal rhythm that catches problems early
I treat water heater maintenance like HVAC filters: light touches often, deeper work annually. After a new water heater installation, schedule the first check at one year. That’s soon enough to catch surprises from local water chemistry and confirm the expansion tank charge. From there, a brief spring and fall walkaround is enough for most homes, with a full service once a year. For rental properties or homes with long vacations, consider a leak detection sensor in the pan and a smart shutoff valve. They’re cheap compared to flooring.
Here’s a simple cadence that keeps you ahead of leaks without turning you into a plumber:
- Twice a year: visually inspect around the tank or tankless cabinet, feel the top connections for moisture, verify the pan is dry and the drain line is clear, and listen during a heating cycle for unusual popping or boiling sounds. Once a year: test the T&P valve, check and adjust the expansion tank pre-charge to match house pressure, flush sediment from a tank-style heater, or descale a tankless unit; examine and replace the anode rod if needed; tighten accessible fittings to manufacturer torque, and verify thermostat settings.
If you prefer to outsource, ask for a water heater service package that includes those items. A thorough visit takes 45 to 90 minutes for a tank-style unit and a bit longer for a tankless, especially if descaling is due.
When a leak means repair versus replacement
Not every leak earns a new heater. Certain failures are contained and fixable. Others are the water heater’s way of saying it’s time.
Replace the heater if water is seeping from the tank body, especially near the bottom seam or under the jacket insulation. By the time water finds its way out there, the interior glass lining has been compromised. Patching the exterior or applying sealants won’t stop corrosion progressing from the inside. If the heater is beyond its warranty and more than 8 to 10 years old, even if the leak looks minor, plan a water heater replacement. That decision avoids a Saturday night emergency and allows time to compare efficiencies, sizes, and whether a tankless option makes sense for your household.
Repair is smart when the leak clearly comes from a component: a loose dielectric union, a sweating cold inlet mistaken for a leak, a dribbling drain valve, or a failed T&P valve with good pressure management elsewhere. On electric models, a wet element gasket is an afternoon fix. On gas models, a seeping anode port or drain valve is usually straightforward. In Holly Springs water heater repair calls, I’ve seen small component leaks handled in the same visit, with advice to revisit the anode schedule or install an expansion tank to keep the issue from returning.
For tankless water heater repair, leaks at service port valves, condensate traps, or internal O-rings are repairable. A leaking heat exchanger, however, typically points to replacement, especially if scale damage is advanced or the unit is outside warranty.
Practical details that make maintenance stick
Good intentions fade if access is a hassle. During water heater installation, set the unit with clearances that honor the manual and a little extra elbow room. On tank-style heaters, position the anode rod under an open ceiling bay or use a segmented rod. Elevate garage installations on a stand where code requires, and keep the pan drain visible so a trickle is seen early. On replacements, upgrade to a metal drain pan with a large-diameter outlet; they deform less and drain better than thin plastic pans.
Label the isolation valves. It sounds trivial until a nervous homeowner shuts the wrong valve during a leak and backfeeds a drip. For tankless units, include service valves with purge ports as standard. They make descaling a clean, contained task instead of a hose balancing act. If you’re scheduling water heater installation in Holly Springs, ask the installer to verify house pressure and set the expansion tank charge before they leave. That ten-minute step prevents months of nuisance weeping at the relief valve.
If your house runs on a private well, sediment and hardness can be higher. A whole-house sediment filter upstream of the water heater and a softener where appropriate reduce scale and prolong both tank and tankless life. I’ve watched tankless heat exchangers in softened homes stay clean for years with simple annual checks, while unsoftened systems in the same neighborhood needed aggressive descaling every six months.
Safety notes that aren’t optional
Water heaters combine scalding water, gas or high-voltage electricity, and in the case of gas, combustion byproducts. While preventing leaks is our goal, never trade safety for dryness.
- Gas models need proper draft and venting. If you see rust streaks at the draft hood, smell exhaust, or notice the flame lifting or burning yellow, call for service. Combustion issues are more critical than a small drip. Seismic straps and bracing matter even outside earthquake zones. They keep rigid gas lines and water piping from stressing the tank connections if the heater shifts. Stressed joints are leak points. Never cap a T&P discharge line to stop a nuisance drip. Correct the pressure problem or replace the valve. If you see water pooling around electrical components on an electric heater, shut power at the breaker before investigating further.
Local realities: Holly Springs homes and the water they see
Neighborhoods around Holly Springs mix newer subdivisions with older homes, which means a blend of plumbing systems. In many newer builds, you’ll find pressure-reducing valves at the meter and closed systems inside. That makes an expansion tank more than a luxury. Holly Springs municipal water runs moderate in hardness, but it’s enough to justify annual flushing for tank-style heaters and annual descaling checks for tankless models. On the outskirts where well water is common, mineral content varies widely by depth and geology. If your coffee maker scales quickly, your water heater is doing the same.
Service availability matters too. If you’re choosing between water heater repair Holly Springs providers, look for techs who carry common valve kits, anodes, element gaskets, and drain valves on their trucks. A well-stocked visit means a leak gets solved in one trip. If you’re weighing water heater replacement Holly Springs options, compare not just brand and price but also installation details: expansion tank included, pan and drain verified, dielectric unions installed, gas sediment trap on gas lines, and for tankless water heater repair Holly Springs or installation work, service valves and condensate routing done to code.
For homeowners considering a switch, tankless systems shine in homes with long hot water runs or high, intermittent demand. Just remember: they’re not maintenance-free. Descaling is the tankless equivalent of flushing a tank, and it’s what keeps leaks from forming inside a stressed heat exchanger. For those who prefer simplicity, https://stephenultn728.cavandoragh.org/how-routine-water-heater-service-lowers-bills-in-holly-springs a high-quality, glass-lined tank with a magnesium anode and a brass drain valve, paired with a properly charged expansion tank, delivers reliable service with minimal fuss. If you need guidance, a holly springs water heater installation specialist can walk through fixture counts, venting routes, and gas sizing before you commit.
Small signs worth your attention
Most leak-prevention wins come from catching small changes early. A faint sizzling sound after a heating cycle on a tank heater often signals moisture at the drain valve landing on a hot surface. A mineral crust forming at the relief valve outlet is the T&P tapping you on the shoulder. A warm spot on the floor near a tankless unit’s condensate line hints at a partial clog. If your hot water takes longer than usual to arrive and the heater seems to cycle more frequently, sediment may be insulating the tank bottom or scale may be pinching flow in a tankless heat exchanger. None of these signs require panic, but they all deserve a call to your water heater service provider.
Cost, lifespan, and the math of maintenance
Homeowners often ask if maintenance really changes the replacement timeline. Based on field experience, the answer is yes by several years. A standard tank heater in average water conditions lasts 8 to 12 years. With annual flushing, anode checks every two to three years, and correct pressure management, I’ve seen them reach 12 to 15. That’s not magic; it’s corrosion delayed and thermal stress reduced. Spend a modest amount on service, and you defer a purchase that typically runs into the four figures.
Tankless heaters advertise longer lifespans, often 15 to 20 years. They achieve that when water quality is managed and descaling is routine. Skip maintenance and a heat exchanger can fail from scale stress in half that time. Tankless units also contain more sensors and seals, which means more small parts that benefit from periodic inspection. Budget for annual service the same way you budget for HVAC tune-ups, and tankless performance stays crisp.
If replacement is on the horizon, consider efficiency and recovery as part of the decision. A right-sized, well-installed new tank may outperform an oversized, sediment-laden dinosaur. A tankless sized for your simultaneous demand can deliver endless showers but will need dedicated gas or electrical capacity. When planning water heater installation holly springs projects, verify utilities and venting before demo day to avoid surprises.
A brief homeowner checklist for leak prevention
- Know your system: tank or tankless, age, fuel type, and whether you have an expansion tank. Keep temperature at 120 degrees at the tap; use mixing valves if storing hotter. Inspect twice a year for moisture at connections, a dry drain pan, and a clear condensate line if tankless. Schedule annual service: T&P test, expansion tank charge check, sediment flush or tankless descale, and anode inspection. Don’t ignore a “weeping” relief valve. It’s either bad or telling you pressure is too high.
When to call for help
DIY curiosity is healthy, but certain moments call for a pro. If you see rust-stained water at the base of a tank, if the T&P valve won’t stop dripping, if your expansion tank feels completely waterlogged, or if a tankless unit throws repeated error codes related to flow or temperature, schedule a visit. For homeowners near or within Holly Springs, a holly springs water heater repair appointment usually covers diagnosis, parts replacement, and a quick pressure evaluation. If the verdict is replacement, a same-day water heater replacement holly springs service can keep your routines intact. For upgrades or new builds, holly springs water heater installation teams can size, vent, and set your system up with maintenance in mind from day one.
The aim isn’t to turn you into a technician. It’s to build a simple rhythm of attention that denies leaks the chance to start. Water heaters are workhorses. Treat them with a bit of routine respect, and they return the favor quietly for years.
Benjamin Franklin Plumbing
Address: 115 Thomas Mill Rd, Holly Springs, NC 27540, United States
Phone: (919) 999-3649